
Creating art from recycled materials is a rewarding experience, allowing us to be creative while reducing waste. Today, I want to share a project close to my heart: making a Kadam (Neolamarckia cadamba) flower using recycled materials. This flower, native to Bangladesh and celebrated for its beautiful round shape and vibrant colors, has always been a favorite of mine, especially during the rainy season. I first made these flowers as a child, and now, I’m excited to share this easy DIY project with you. Let’s dive into the process!

Materials You Will Need:
- Mousse plastique (used to protect fruits) – ideally in white and yellow
- Scissors
- Glue
- A stick or small branch of a tree
- Green crepe paper
- Yarn
- Flower tape
1. Gathering Your Materials
For this project, I used mousse plastique, the kind often found wrapped around fruits to protect them. It’s a great material to work with because of its light and flexible texture, but be careful—it’s fragile and requires patience.
Along with the mousse plastique, you’ll need a pair of sharp scissors, some glue, a small branch (I love using natural materials like branches to give the flower a realistic touch), green crepe paper for the leaves, and flower tape to finish the piece. All of these materials are easy to find and often already available in your home.

2. Preparing the Mousse Plastique
To start, I chose white and yellow mousse plastique for my Kadam flower. First, I separated the yarn-like structure of the mousse by hand. You can also use scissors to cut it into finer strands, but I find hand separation allows for a more natural texture.
Next, I cut the white mousse pieces a bit longer than the yellow ones, which will give the flower a realistic gradient from its yellow center to the white outer layer. Each piece needs to be small but long enough to form a pompom later on.


3. Creating the Pom-Pom Flower Head
Once I had the pieces ready, I took some yarn and tightly tied the mousse strands together in the middle. This forms the foundation of the Kadam flower’s spherical shape. After tying, I fluffed out the mousse pieces to create a rounded, pompom-like shape.
Tip: Use scissors to trim the edges evenly, ensuring a smooth, round flower head. I recommend doing this step carefully because it helps the pompom resemble the dense, globe-shaped clusters of a real Kadam flower.


4. Attaching the Flower to a Branch
For the stem, I love using natural materials, so I collected a small branch from a tree. The rough, natural texture of the branch contrasts beautifully with the softness of the pompom flower.
I applied glue to the base of the pompom and pressed it firmly onto the branch. Be sure to hold it in place for a minute or two, allowing the glue to set. If you find the pompom isn’t sticking well, you can also wrap a bit of yarn around the base for extra support.


5. Making and Adding the Leaves
Next, I used green crepe paper to make the leaves. Cut the paper into leaf shapes, making sure the size is proportional to the flower and branch. Crepe paper has a flexible texture, so you can give the leaves a slight curve to mimic real leaves.
I glued the leaves along the branch, arranging them in a natural pattern. To secure them better, I used a little bit of thread to fix the leaves more securely. After that, I wrapped flower tape around the branch to cover the thread, giving the branch a polished and cohesive look.


6. Final Touches
The flower tape not only helps hide imperfections but also provides a more finished look, making your Kadam flower appear more lifelike. Once the tape is in place, take a moment to adjust the shape of the flower head and leaves.
And that’s it! You’ve created a beautiful, handmade Kadam flower using recycled materials. It’s a simple yet delicate project that brings joy not only because of the process but because of the memories it evokes.


The Significance of Kadam Flower (Neolamarckia cadamba)
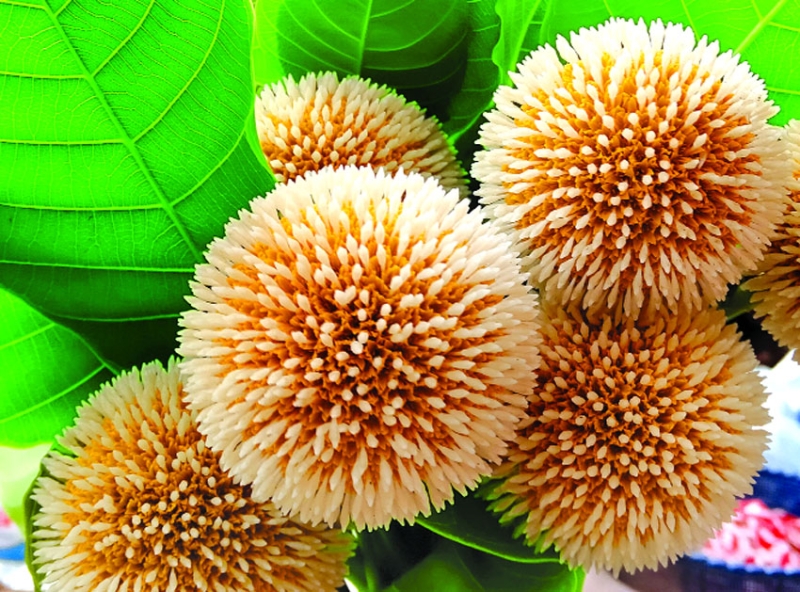
The Kadam flower holds a special place in Bangladeshi culture, particularly during the rainy season when it blooms in abundance. It’s known for its fragrant, globe-shaped flowers that are often used in perfumes.
With its bright orange flowers clustered in dense, ball-shaped heads, the Kadam tree can grow up to 45 meters (148 feet) tall. It’s not just admired for its beauty but also plays a role in the ecosystems of South and Southeast Asia. The tree is also celebrated in Indian religion and mythology, making it a symbol of joy and vitality.

Why This Project Brings Me Joy
As a child, I used to make Kadam flowers for fun, and recreating them now as an adult brings back fond memories. This project made me happy not only because I was able to recycle materials but because it connected me with my past.
I encourage you to try this project in your free time—it’s a wonderful way to spend a creative afternoon and honor the beauty of nature. Whether you’re familiar with the Kadam flower or not, this simple DIY creation is a fun way to explore the wonders of handmade art.


Happy DIY creating!
Leave a Reply